


 Español
 Deutsch
 عربى
عربى
1. Introduction In modern society, with the increasing trend of population aging and the accelerating pace of life, the importance of means of transpo...
READ MOREHow to Diagnose Mobility Scooter Error Codes and Extend Your Machine's Life
Why Electrical Faults Are the Most Common Scooter Complaint
Most service calls for a stalled or unresponsive scooter trace back to the electrical system rather than mechanical wear. A loose connector, a corroded terminal, or a battery that has dropped below its usable voltage threshold can all produce the same symptom: a machine that simply will not move. Understanding this pattern changes how an owner approaches troubleshooting. Instead of assuming the worst, a methodical check of power delivery, from battery terminals through to the controller, resolves the majority of reported faults without a single part being replaced.
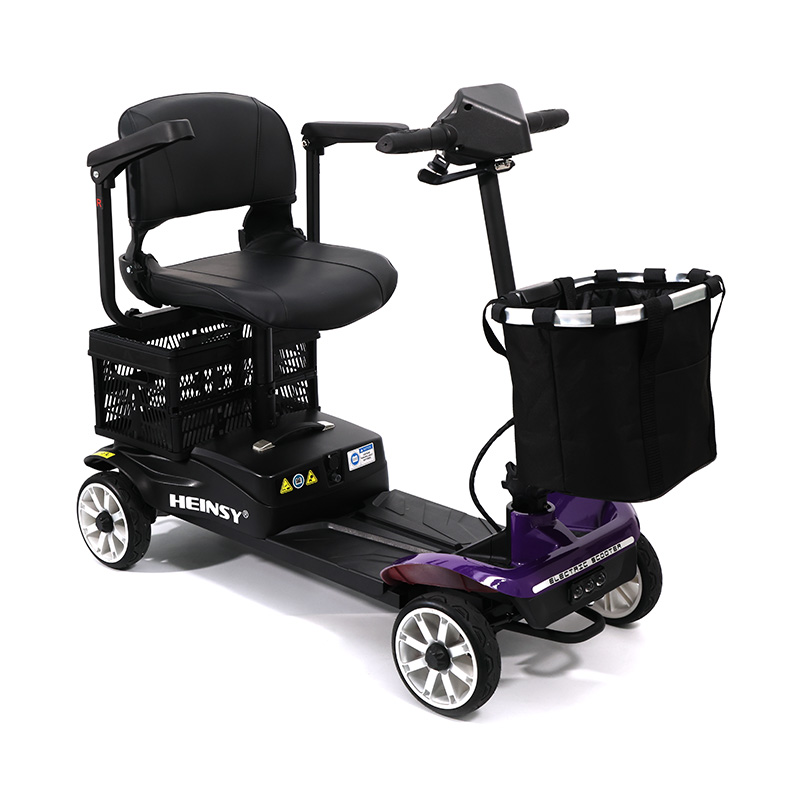
A well-maintained mobility scooter depends on three systems working together: the battery pack, the motor controller, and the drive motor itself. When any one of these underperforms, the control panel typically responds with a flashing light pattern or a numeric code rather than total silence. Learning to read those signals is the first and most cost-effective repair skill an owner can develop.
Decoding Common Error Codes on Your Control Panel
Control panels vary by model, but most use a combination of flash counts and steady tones to narrow down the fault category. The table below groups the most frequently reported patterns and what they generally indicate across battery-powered scooter platforms.
| Signal Pattern | Likely System | Typical Cause | Suggested First Step |
| 1 flash, repeating | Battery | Low charge or weak cell | Charge fully, retest voltage |
| 2 flashes | Throttle | Sensor misalignment | Inspect throttle wiring harness |
| 3 flashes | Controller | Overcurrent protection triggered | Check motor for obstruction |
| 4 flashes | Brake system | Electromagnetic brake fault | Listen for brake release click |
| Steady tone, no display | Main fuse | Blown fuse from surge | Locate and inspect fuse holder |
| Display blank | Power connection | Loose battery connector | Reseat connector, clean contacts |
These patterns are general guidance rather than a universal standard, since flash sequences differ between control panel manufacturers. Cross-referencing the exact sequence against the code table printed in the pride mobility scooter owners manual style documentation that ships with the unit remains the most reliable way to confirm a diagnosis before ordering parts.
Battery Health: Reading the Warning Signs Before Failure
Deep-cycle batteries used in powered mobility equipment typically deliver between 300 and 500 full charge cycles before capacity drops below a usable threshold, usually cited as 80 percent of original output. Once a battery falls under that line, symptoms appear gradually: shortened range, slower acceleration on inclines, and a charge indicator that jumps rather than declines smoothly.
Practical tip: Test battery voltage with a multimeter after a full charge and again after 30 minutes of rest. A drop of more than half a volt during that rest period on a sealed lead-acid pack often signals internal sulfation, a common precursor to failure.
Because battery degradation is chemical rather than mechanical, no amount of cleaning or wiring adjustment restores lost capacity. When testing confirms the pack is the fault, replacement is the only durable fix. Shopping for a compatible electric mobility scooter battery pack means matching voltage, amp-hour rating, and terminal type exactly, since undersized packs shorten motor life and oversized packs may not fit the battery tray.
- Match voltage first: 12V, 24V, or higher depending on the drive system
- Match amp-hour rating to preserve expected range
- Confirm terminal style, since quick-disconnect and screw terminals are not interchangeable
- Check physical dimensions against the battery compartment before ordering
A Step-by-Step DIY Troubleshooting Checklist
Before assuming a part needs replacement, working through a structured checklist eliminates the simplest causes first. This sequence is designed to move from least invasive to most technical.
- Confirm the key switch is fully turned and the freewheel lever is in drive position, not neutral
- Inspect the charging port and battery terminals for corrosion or looseness
- Check the main fuse using a multimeter set to continuity mode
- Test battery voltage under load, not just at rest
- Examine the throttle cable or sensor for physical damage
- Inspect wheel motors for obstructions such as trapped debris
- Review the control panel error code against manufacturer documentation
- If all steps pass without resolution, isolate the controller as the likely fault
This order matters because each step rules out an entire category of failure. Skipping ahead to controller replacement, for example, is a costly mistake if the actual problem is a five-cent fuse.
How to Read a Wiring Diagram Without Guesswork
A wiring diagram maps how current flows from the battery through the key switch, controller, and out to the motor and brake assembly. Reading one does not require an electrical background, only an understanding of the standard flow shown below.
When a diagram shows two output paths from the controller, as illustrated above, a fault isolated to only one side, such as the brake failing to release while the motor spins freely, points directly to that specific wire run or connector rather than the controller as a whole.
Using the Owners Manual as Your Parts Reference Guide
Every legitimate replacement part order starts with a model and serial number, both of which are recorded in the owners manual along with a labeled parts diagram. This diagram assigns a reference number to each component, from armrest hardware to the motor brush assembly, which prevents the common mistake of ordering a part that looks similar but does not match the mounting pattern.
| Manual Section | Information Provided |
| Specifications page | Battery voltage, motor wattage, weight capacity |
| Exploded parts diagram | Reference numbers for every replaceable component |
| Wiring schematic | Color-coded connections between major systems |
| Maintenance log | Recommended service intervals |
| Warranty terms | Coverage period for battery and drivetrain parts |
If the original manual has been lost, the serial number plate, typically located beneath the seat or on the battery compartment, still allows a part supplier to identify the correct component specifications.
DIY Fix or Professional Repair Near Me? A Decision Framework
Not every fault belongs in the owner's hands. Deciding when to search for local repair support instead of continuing DIY work depends on the tools required, the safety risk, and whether the fix affects a warranty.
| Task | Recommended Approach | Reason |
| Cleaning terminals, checking fuses | DIY | Low risk, no specialized tools |
| Battery replacement | DIY | Straightforward if terminal type matches |
| Controller replacement | Professional | Requires calibration to motor specifications |
| Motor brush or bearing service | Professional | Involves disassembly and alignment |
| Frame or suspension repair | Professional | Structural safety implications |
For any task listed as professional, searching for a local service center rather than shipping the unit long distance saves both time and freight cost, since batteries in particular face shipping restrictions in many regions.
A Seasonal Maintenance Schedule That Extends Scooter Life
Consistent, low-effort maintenance prevents the majority of failures covered above. The schedule below reflects intervals commonly recommended across mobility equipment service documentation.
- Weekly: Wipe down terminals, check tire pressure, confirm charger connection is secure
- Monthly: Test battery voltage under load, inspect brake responsiveness
- Quarterly: Lubricate moving joints per manual specifications, tighten visible fasteners
- Annually: Full inspection of wiring harness for cracking or fraying insulation
Owners who follow a documented schedule report significantly fewer emergency repair situations, largely because early-stage corrosion and connector wear are caught before they escalate into a full system fault.
Frequently Asked Questions
Q1: Why does my scooter beep but not move?
A beeping tone without movement usually indicates the controller has detected a fault condition, most commonly a battery voltage drop under load or an obstruction preventing the motor from turning freely.
Q2: How long should a replacement battery last before needing another swap?
Most deep-cycle battery packs used in mobility equipment last between one and three years depending on charge frequency, storage temperature, and how deeply the battery is discharged between charges.
Q3: Can I use a universal battery instead of a model-specific one?
Only if the voltage, amp-hour rating, and physical dimensions match exactly. A mismatched battery can cause charging errors, reduced range, or damage to the charging circuit.
Q4: What should I check first if the display shows nothing at all?
Start with the main fuse and the battery connector, since a blank display almost always points to a power interruption rather than a controller failure.
Q5: Is it safe to charge the battery every night regardless of remaining charge?
Yes, for most sealed lead-acid and lithium packs used in mobility equipment, nightly charging is recommended and does not shorten battery lifespan when using the manufacturer-approved charger.
Q6: When does a repair stop being worth doing myself?
Once a fault involves the controller, motor internals, or frame structure, professional diagnostic equipment and calibration tools are typically required, making local repair support the safer and more cost-effective option.
PREV:How to Maximize Mobility Scooter Battery Lifetime and Driving Range: Essential Care Guide
NEXT:How to Choose the Right Mobility Scooter for Your Lifestyle and Mobility Needs
NEXT:How to Choose the Right Mobility Scooter for Your Lifestyle and Mobility Needs
Interested in cooperation or have questions?
News

-
The information provided on this website is intended for use only in countries and jurisdictions outside of the People's Republic of China.
-
Office Address
Room 315, building5, No.45 Songbei Road, Suzhou area, China Pilot Free Trade Zone
-
Factory Address
No. 2 Shanyan Road, Huzhen Town, Jinyun Country, Lishui, Zhejiang, China
-
Mobile Phone
+86 137 7606 7076
-
Email
taylor.liu@heinsmed.com
Stay Connected
lf you can't find the answer you're looking for, chat with our friendly team.
Mobile
Copyright © Suzhou Heins Medical Equipment Co., Ltd. All Rights Reserved.
Custom Mobility Scooters for Elderly Suppliers
Custom Mobility Scooters for Elderly Suppliers